On this site you will learn how to make an aeroponic garden disigned by the Awesome is What We Totally Are Team. To learn more about areoponics and hydroponics go to http://awesomeiswhatwetotallyare.com/awesomeaeroponics/.
Please consider supporing us on Piggybackr!
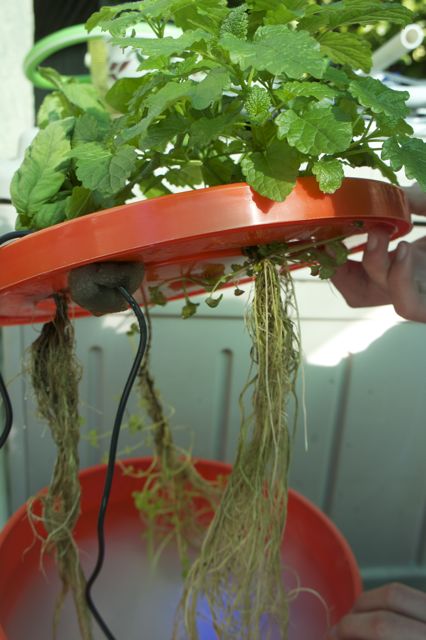
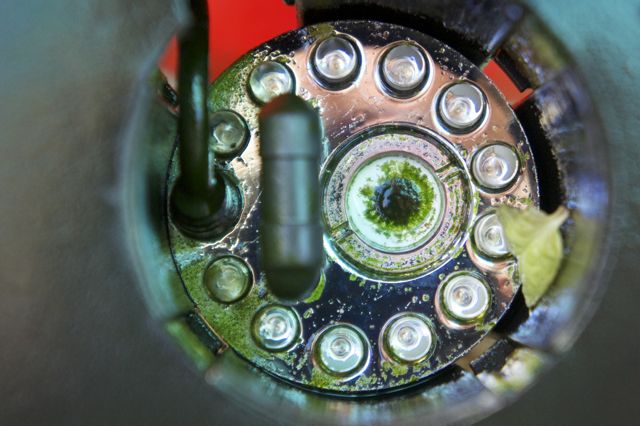
This system is a way of growing plants without soil. The system includes a fogger which, while floating on the water, creates 5-10 micron water droplets which it 'throws' into the air; thus the name aeroponics. Aeroponic systems average up to 13 crop turns a year, which compared to the soil's 5, is quite alot. This system does not take up much space, as it is contained in a five gallon bucket. You also have complete control over your plants: the nutrients, air temperature (it's quite portable), moisture, and you can rein in those diseases that kill your average soil plant. This system actually uses about 90% less water than soil gardening. With traditional gardening, the soil soaks up the water then over time transfers some to the plant's roots, the rest evaporates.
|
|||||||||
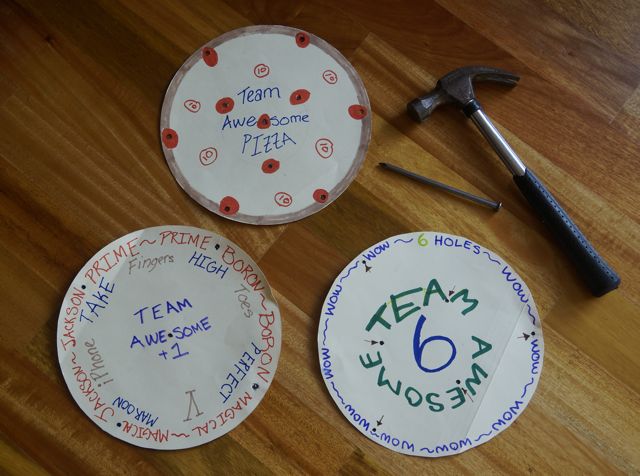
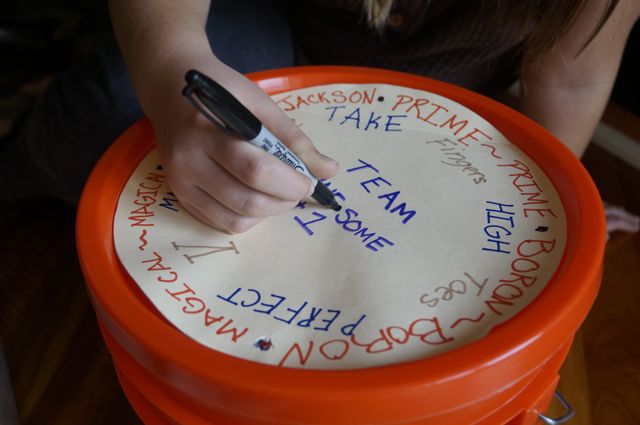
| STEP 1 | Place the lid on the bucket and mark where you would like to drill your holes. Remember that the holes will be one inch wide so do not make the markings too close together. From our experience, 4-7 holes is a good amount. Be aware that one hole will be taken up by the fogger cord, so make one more hole than the number of plants you want to grow. These pictures show a template we created from thin cardboard to help us make sure our holes are easily spaced since we make a lot of these gardens. You do not need one; you can easily do it by eye. | ||||||||
 |
|||||||||
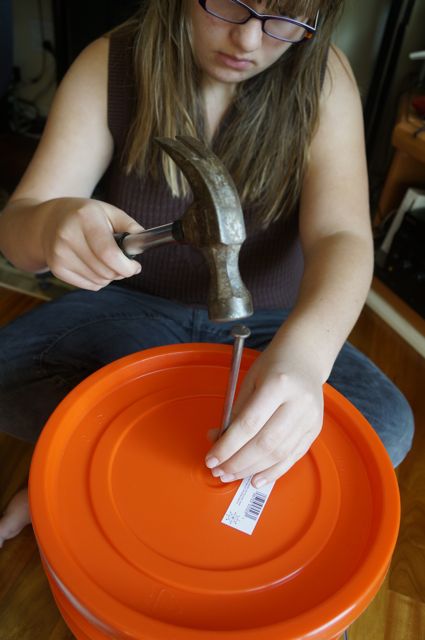
| STEP 2 | Make a starter hole by hammering a nail into the middle of your mark made in step 1. This will make the drill steady when you make the holes. | ||||||||
 |
|||||||||
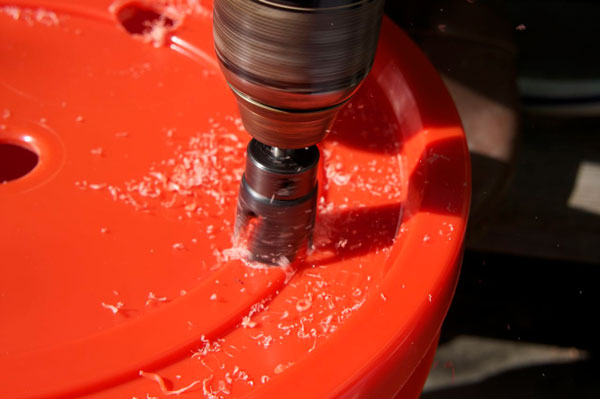
| STEP 3 | Place the tip of the drill bit into your starter hole and drill. Be careful to keep your drill steady, we don’t want anyone to hurt themselves during this process. Note that for some drill bits it may take a while to get the plastic out of the bit. Be sure to do it anyway. | ||||||||
 |
|||||||||
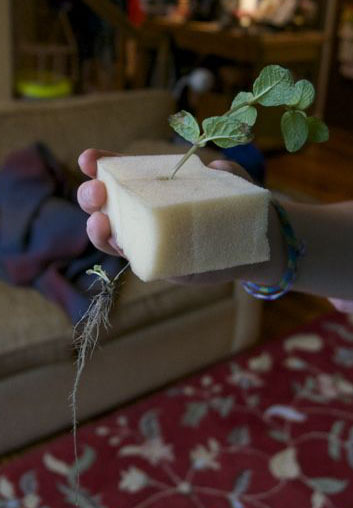
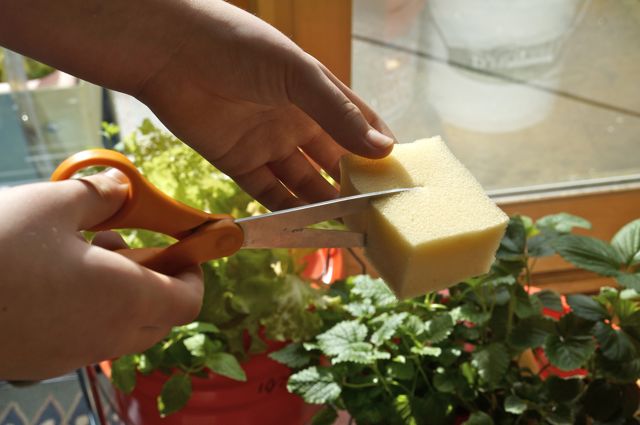
| STEP 4 | Cut your foam into two inch squares, then make a slit that goes halfway through the square foam piece. This is where your plant will sit. The stem will be in the slit with the roots dangling below and the plant leaves on top. Make one square foam piece for each hole you drilled, including the one for the wire. | ||||||||
|
|||||||||
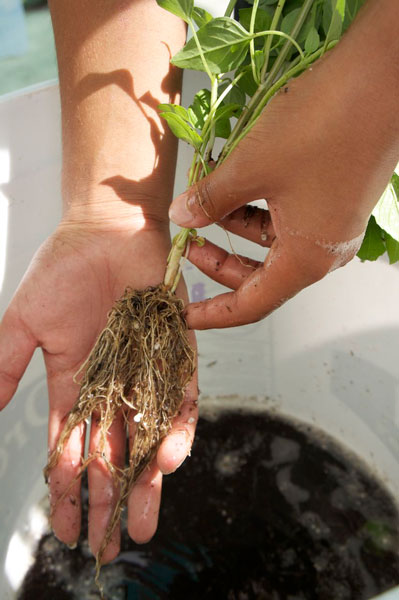
| STEP 5 | Gently get your plant out of its container and rub off excess dirt. It’s OK if there is still dirt on it. Place the roots in your water and swish it around. Try to get as much dirt off the roots as you can. Note that the roots might not be white. Place the cleaned plants on a wet piece of paper towel until you are finished preparing the bucket and water with nutrients. | ||||||||
 |
|||||||||
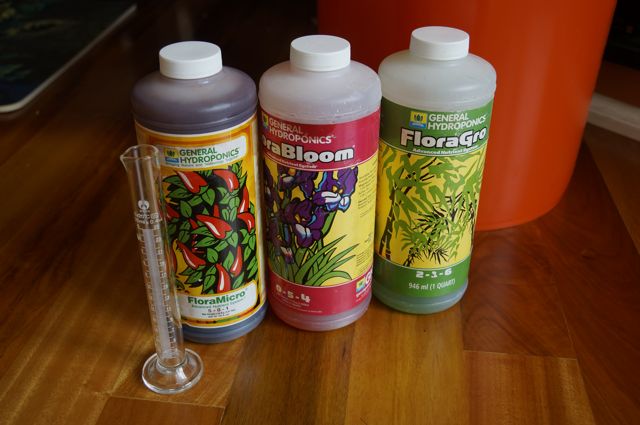
| STEP 6 | Measuring out the nutrients: After making sure your bucket is clean (you don't want any plastic shavings in there), fill the bucket with new water and nutrients. If you're using the flora series (we are) here are the recommended amounts of nutrients for 2 gallons of water:
Pour two gallons of water in the bucket, then measure the nutrients out separately and pour in to the water. WARNING: DO NOT mix the three nutrients together! Mixing these high-concentration nutrient solutions together causes precipitation, which means that the plants can not absorb the nutrients. We recommend changing the nutrients every 3 weeks or so. You can get the nutrients here. |
||||||||
 |
|||||||||
| STEP 7 | Place the cleaned plants into the foam. The stem of the plant should sit in the slit with the roots dangling down into the bucket/root chamber. One piece of foam per plant. Remember to leave one hole empty for the fogger. | ||||||||
 |
|||||||||
| STEP 8 | Place the fogger in the middle of the float and place the combined assembly into the bucket. Thread the fogger's wire through one hole in the top and put the foam around it (wire in the slit) to keep fog from escaping. Plug in the fogger. If it does not generate fog, gently push the fogger down a bit so that water covers it. This will usuually start the mist. | ||||||||
 |
|||||||||
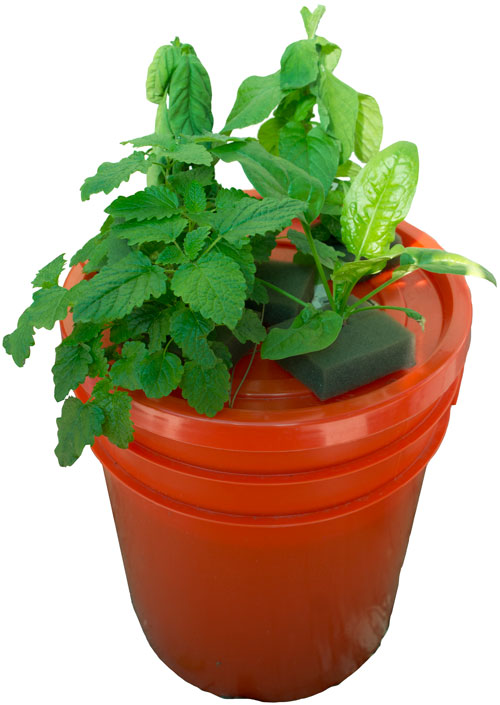
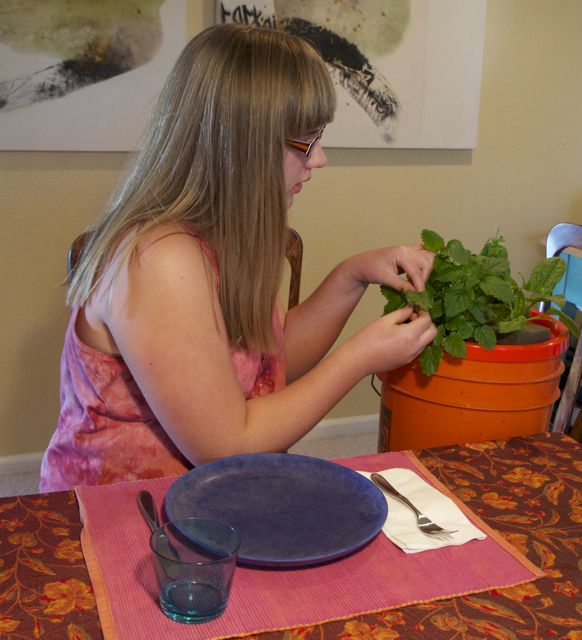
| STEP 9 | Place the top on the bucket and your aeroponics garden is complete. Enjoy your hyperlocavoric food grown in your very own awesome aeroponic system! |
||||||||
 |
|||||||||
Maintenance: Remember every ~3 weeks do the following: |
Maintenance: Replace water and nutrients Hints: 1. After the trauma of transplanting, your plants will take 3-4 days to recover. 2. We have found that heat can build up in the root chamber and cause your plants to wilt. Move your bucket to a cooler area and out of direct sunlight, to remedy this. 3. Until your plants have a substantial root system, they may be top heavy, they are susceptible to wind. |